 |
| Template finished |
With all the preparation in place, I thought I had better test the system and see what the Myrtle strips would look like. So I pasted form #29 and form #39 onto some board and created a pseudo strongback with the shaped forms in place. Then I cut a few strips from a piece of Myrtle I had in the timber stack. They were about 700mm long, approximately one inch wide, and about ¼ inch thick.
That done, I covered the edges of the form with clear packing tape so the hot melted glue would not permanently stick. OK, start at the part line – that is the line between the hull and the deck at which, after planking the kayak, you pull the two sections apart and start to remove the strongback and the forms. You are left with two rather thin wood and epoxy skins ready for the cloth and resin to be applied on the inside – then joined together.
Attach the first strip at the part line with hot glue from the glue gun and bingo, the boat has started. Next, take a second strip and butt it horizontally against the first and ensure that the two faces are a perfect match. **Note: Close enough is not good enough. The two pieces of wood have to match exactly, or you will see the joint.
 |
| Testing strip at part line |
How does one match the two pieces? Plane the lower attached strip with your special micro plane which is only ¼ inch wide. Test, fit, look, plane just a little more off, look, adjust, and finally, when it is perfect – look again. Only then are you ready to apply glue to the two pieces.
The glue used in this situation is very special. It is Titebond Original – the one with the red label. Now, I have been using this brand for years, but not the Original, which has a tack (when it starts to get tacky and attach) time of only minutes. It starts to dry and harden within minutes, so you have to work quite quickly. Add a thin line of glue to the secured strip. Get your hot glue gun ready and apply the next strip. Where it touches the form, apply a small spot of glue and press the strip to the form and wait till glue hardens – seconds. Do the same to the next form, and you have the second strip attached, but you now have to keep the second strip hard up against the first.
 |
| Template almost finished Green masking to hold together |
To do this, use the special rough green masking tape and bind the two strips together from front side to the back. Where applicable, one can use a G clamp or a piece of ply with a slot cut in it the same size as the two strips. This keeps the two strips aligned together – clever.
Leave for about an hour and continue adding strips.
If you are in a hurry, one can staple the added strip to the form, and you don't need to use tape or wait. BUT when you remove the staple, you leave a set of two holes where the staple went through the strips. I just don't like the look of that, so time and tape will be my method.
I proceeded along this path until I had covered one side of the two forms of my template.
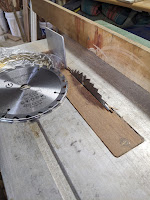
**Lesson Learned: Before attaching any strips, put them through the thicknesser to ensure that they are all the same thickness. The table saw does not cut them consistently to the same thickness. Also, make sure they are square at the edges and straight so that when you butt them up against each other, they will not leave a gap.
Take your time to see the two strips match each other perfectly. You cant undo the join if the gap shows!


